
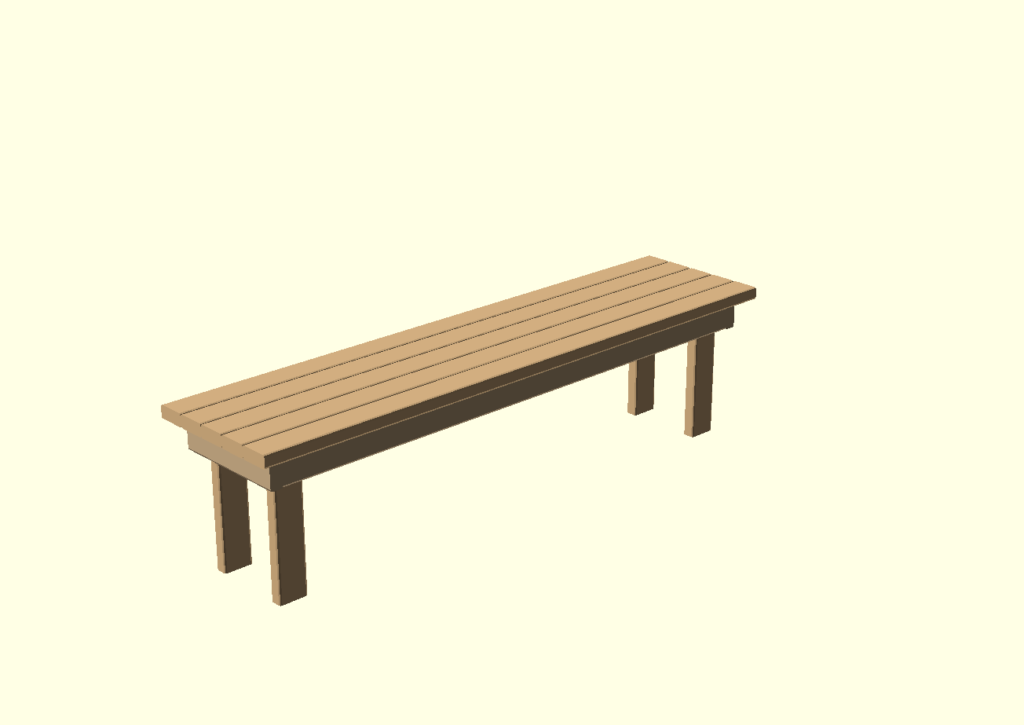
This bench can be built in an afternoon and costs around $50 in material. Which consists of seven 8′ 2x4s and a box of at least 60 3″ Outdoor Decking Screws.
Tools you’ll need:
- Tape measure (72″ minimum)
- a square or speedsquare
- Handheld Drill
- a small drill bit (for pilot holes, just needs to be smaller than the diameter of your decking screws)
- an approriate saw (a handsaw works fine, a chop/miter saw works better)
- a pencil
- a flat work surface (a clean flat garage floor works fine, as do sawhorses)
- a healthy respect for your tools and safety 🙂
Cut your lumber to the following lengths and quantities:
- 72″ x5
- 65.5″ x2
- 17″ x4
- 14″ x2
- 11″ x1
All the short pieces can be cut from the remnants from the seven long pieces. Since these are going to live outside year round, I used pressure treated lumber.
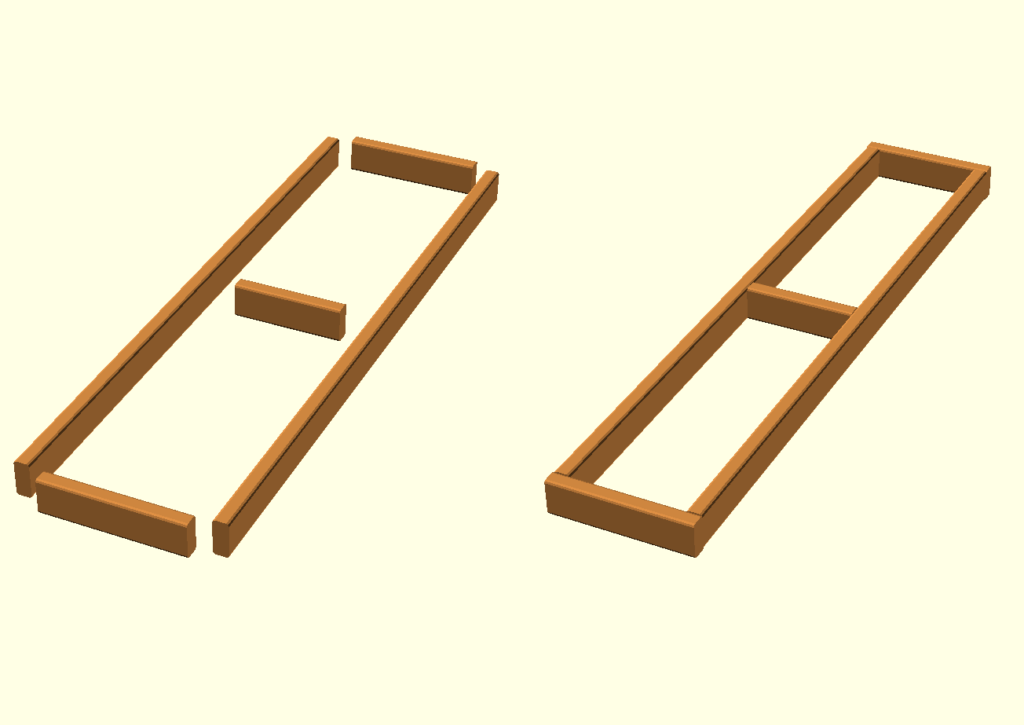
Use the two 65.5″, two 14″, and 11″ pieces. The 14″ pieces go at each end, and the 11″ piece goes in the middle.
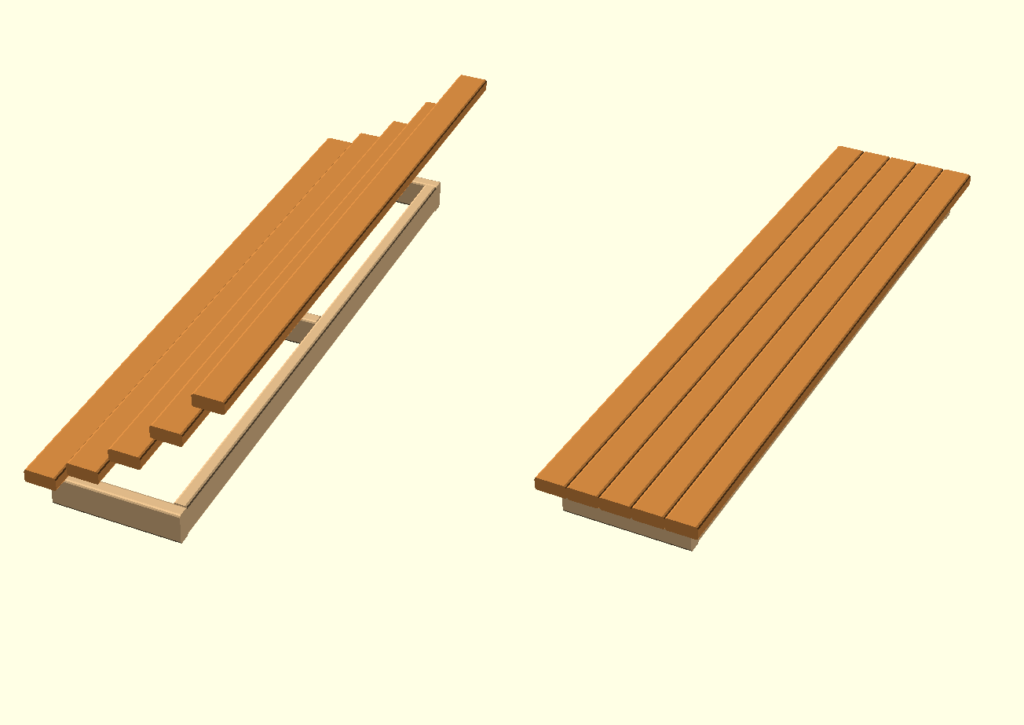
Use the five 72″ pieces. To ensure symmetry, it is best to start by lining up and screwing down the middle piece first. Then work outward on both sides. The end pieces overhang quite a bit, I found it beneficial to run a line of glue down before attaching them. Alternatively you could extend and miter the 14″ pieces of the frame, to add more support.
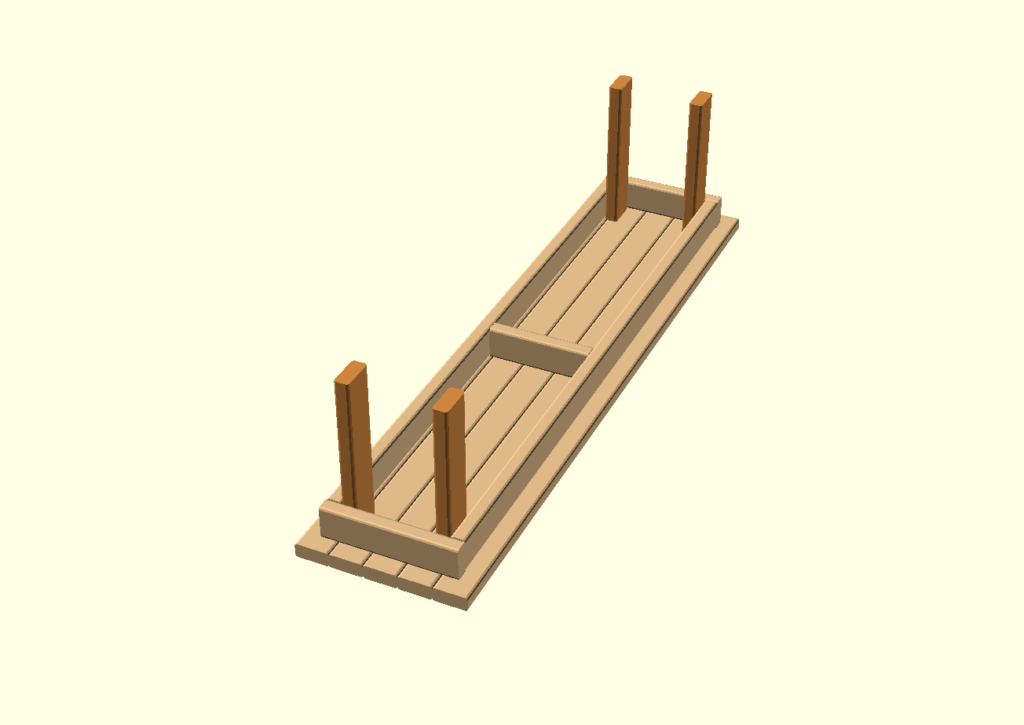
This is a simple step, just screw in the four 17″ legs. If you want it to look uniform, you can make a template like I did, but these screws aren’t that noticeable when assembled. I didn’t show it in the video, but I did measure out the placement of every screw on this bench; just to get a nice uniform look.
Comments are closed, but trackbacks and pingbacks are open.